Suturing of wounds –
Nurse’s Responsibility, Procedure,
After Care of Patients and
Removal of sutures
Suturing of wounds primarily is the responsibility of the surgeons. Rarely, the nurses may have to undertake this responsibility. This depends upon the hospital customs.
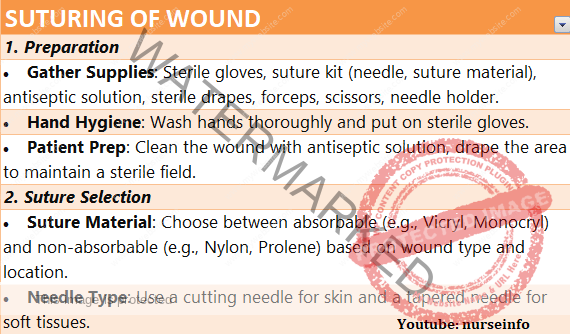
TYPES OF SUTURES
The sutures are classified into interrupted and continuous sutures. In interrupted type, each suture is tied and knotted separately. In continuous sutures, one thread runs in a series of stitches and is tied only at the beginning and at the end of the run.
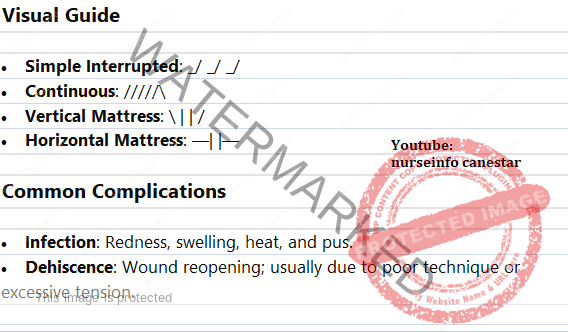
According to the pattern of suturing, it can be classified into plain interrupted, plain continuous, mattress interrupted, mattress continuous and blanket continuous.
Retention sutures are very large plain interrupted sutures that are seen in some incisions in addition to the skin sutures. These large sutures involve not only the skin but also the underlying tissues of fat and muscles. They are used to give support to the incisions in obese individuals or in situations in which wound dehiscence is suspected. The retention surfaces may have rubber tubing over them to prevent these sutures cutting through the skin. Usually they are left in place longer than the skin sutures (14 to 21 days).
When suturing the wound, each suture should be placed as deep as it is wide. The distance between the sutures should be equal the depth and the width.
SUTURE MATERIAL
A suture is either a surgical gut (catgut) or a non absorbable material. Suture materials can be broadly classified into absorbable (surgical gut or catgut) and non absorbable (cotton silk, nylon wire, Dacron etc).
Advantages of a Surgical Gut are:
1. It is absorbed readily.
2. It is easily handled.
3. Available in multitude of sizes ( the size may range from 0000000 to No. 5)
4. It can be used to suture tissues beneath the skin.
Advantages of Non-absorbable Suture are:
1. They have a high tensile strength. (they are not easily broken)
2. They are relatively inexpensive.
3. Less tissue reaction.
4. They are used on the skin and are removed.
5. They are used as ligatures. (A ligature or a tie is a free piece of suture material used for purpose of tying blood vessels that have previously been clamped with an artery forceps)
Surgical gut can be classified into plain gut and chromic gut. Plain gut is absorbed in 5 to 10 days. Chromic gut has a prolonged absorption time of 10 to 40 days.
Suture Needles
Suture needles are classified in different ways:
1. Straight and Curved Needles
When the wound is deep, a curved needle is used. It is used with a needle holder. Curved needles are again classified into curved, half circle etc.
For suturing the layers of the skin, a straight needle is used. Straight needles are generally used without a needle holder.
2. Cutting Needle and Non-cutting Needle (Round Body Needles)
Cutting needles are three edged triangular needles. These needles may cut into the tissues to allow for the easier passage of the suture. So they are used for the suturing of dense tissues such as skin, cervix of the uterus and tendons. Non-cutting needles are used for suturing the tissues beneath the skin.
3. Traumatic and Atraumatic Needles
Traumatic needles or eye needle has an eye or opening on one end through which the suturing material is drawn to thread it.
Atraumatic needles are specially made needles with no eye. The suturing materials are inserted within the metal of the needle during the manufacturing process, so that the diameter of the suture is not greater than the needle. It has several advantages. They produce minimum tissue trauma and there is less damage to the suture strand. So they are used for suturing such delicate structures as intestines, brain, mucus membranes and nerves.
GENERAL INSTRUCTIONS
1. Follow strict aseptic techniques as for caring of wounds.
2. Clean the wounds thoroughly if contaminated with dust particles or when blood clots are present.
3. Control the bleeding by the application of ligatures if necessary.
4. Trim the ragged edges of the wounds and cut off the dead tissues, if any, using a sharp scissors.
5. If there is a foreign body in the wound such as a sharp instrument or a sharp object which might have caused the wound. It should not be removed until everything is ready for the wound suturing. Removal of the object may cause heavy bleeding.
6. Thoroughly wound assessment should be done to detect complications.
7. Whenever possible, minimize the pain by the use of local anaesthetic. It should be prepared in correct strength e.g., Lignocaine 1 to 2 percent. No anaesthetic with adrenaline should be used unless it is ordered by the surgeon.
8. Antiseptics used for the wound should be non-irritating to the skin and mucus membranes.
9. The length of the suture material should be neither too long nor too short. The approximate length of the suture is 15 inches. When threaded, allow 12 inches on one side of the needle and 3 inches on the other side.
10. A curved needle is threaded from the inner curve outward to prevent the suture from falling out of the people.
11. Always grasp the skin edge with toothed forceps.
12. Space stitches evenly.
13. Do not tie the knots with excess tension since this will traumatize the wound. If tied too tightly, the stitches will be tighter on the next day due to oedema.
14. The skin edges should be approximated to help in the healing of the wound and to prevent gapping of the wound.
15. When cutting the sutures, leave ¼ inch from the knot to prevent the knot from becoming undone. Holding the suture ends taut and at right angle to the skin, cut the suture by holding the scissors parallel to the skin.
NURSE’S RESPONSIBILITY IN THE SUTURING OF WOUNDS
In almost all the hospitals, suturing of the wound is the responsibility of the doctors. However occasionally, the nurse is held responsible for suturing small wounds. This depends upon the policy of the institution.
Preliminary Assessment
1. Assess the circumstances under which the wound was produced. This will help to evaluate the possibility of wound contamination.
2. Assess the nature of the wounding object e.g., blunt, sharp, etc. this will help to assess the depth of penetration of the object and also to identify the puncture wounds.
3. Assess the duration of time after the injury. This will help to assess the healing process. If the wound is exposed for a prolonged period, there always is the possibility of wound infection.
4. Check the presence of existing illness in the patient that may influence the healing process e.g. Diabetes mellitus.
5. Prior healing history is to be assessed. This will help us to find out abnormal bleeding time, wound dehiscence in the past, formation of excessive scar tissue etc.
6. Check the drugs, the injured person has been taking e.g., cortico-steroids. This will delay the healing process.
7. Take a history of allergies in the past, especially allergic reaction to local anaesthetics.
8. Date of most recent tetanus immunization. All patients with a roadside injury should be given tetanus toxoid to prevent tetanus.
9. Wound location and the type of wound. A penetrating wound should be sutured under general anaesthesia. There is the possibility of injury of the underlying organs.
10. Watch for the presence of foreign bodies, presence of penetrating objects etc. penetrating objects should not be disturbed until everything is ready for suturing, for fear of bleeding.
11. Assess the presence of devitalized tissues. This necessitates debridement prior to suturing.
12. Presence of bleeding. The bleeding points have to be ligated before suturing to prevent further bleeding.
13. Presence of complications such as fractures, shock, tendon injuries, nerve injuries etc. this necessitates further treatment.
14. Check the consciousness of the patient and the ability to follow instructions.
15. Check the ability and limitations.
PREPARATION OF THE ARTICLES
Articles
A sterile tray containing:
1. Sponge holding forceps – 1
Purpose: to hold the cotton balls or gauze pieces for cleaning the wound and the surrounding tissues.
2. Slit or dressing towels with towel clips
Purpose: to create a sterile field around the wound.
3. B.P. handle with blades
Purpose: to debride the wound edges or to cut the devitalized tissues.
4. Scissors – 2, one pointed and one round tipped.
Purpose: to debride the wound edges, to cut the sutures, dressing materials etc.
5. Dissecting forceps – 2, one plain and one toothed.
Purpose: to hold the sutures, wound edges and dressings.
6. Artery forceps (hemostats) – 4: straight -2, curved -2.
Purpose: to check haemorrhage by catching the bleeding points.
7. Tissue forceps -2.
Purpose: to hold the wound edges.
8. Skin retractors – 2.
Purpose: to keep the wound edges apart, in order to visualize the wound.
9. Suture needles, non cutting, curved.
Purpose: to suture the tissues beneath the skin.
10. Suture needles, cutting -2, one straight and one curved.
Purpose: to suture the skin.
11. Needle holder -1.
Purpose: to hold the suture needles.
12. Probe -1, sinus forceps -1.
Purpose: to explore the wound and to find any cavities leading to the wound.
13. Suture materials, Catgut and non-absorbable materials.
Purpose: to suture different layers of the wound.
14. Syringes – 20ml, and small bowl.
Purpose: to take the cleaning solution for the cleaning of the wound.
15. Syringes -5ml with 2 needles.
Purpose: to administer local anaesthesia.
16. Gown, gloves and masks.
Purpose: to ensure asepsis.
An unsterile tray containing:
1. Cleaning lotions-spirit, iodine, normal saline etc. and Tr. Benzoin.
Purpose: to clean the wound and the surrounding areas. Tr. Benzoin is used for the sealing of small wound edges.
2. Local anaesthetics e.g., Lignocaine 1 to 2 percent.
Purpose: to anaesthetize the wound edges.
3. Transfer forceps in a sterile container.
Purpose: to handle sterile supplies.
4. Dressing materials in sterile containers-cotton balls, gauze cotton pads etc.
Purpose: to clean and dress the wound.
5. Bandages, elastoplasts, scissors.
Purpose: to secure the dressings in place.
6. Kidney tray and paper bag.
Purpose: to receive the wastes.
7. Mackintosh and towel.
Purpose: to protect the bed and garments.
Preparation of the Patient and the Environment
1. Explain the procedure to win the confidence and co-operation of the patient. Explain the sequence of the procedure and tell the patient how he can co-operate with you. Reassure the patient and his relatives.
2. Get the signature of the patient or his guardian in case anaesthesia is to be given.
3. Prepare the wound area as for a surgical procedure. Shave the hairy regions. Clean the surrounding skin thoroughly with an antiseptic. While shaving and cleaning the area, place a sterile cotton pad or gauze piece over the wound to prevent future contamination of the wound.
4. Give analgesics if the patient is in pain.
5. Provide privacy with curtains and drapes, if necessary.
6. Protect the bed with mackintosh and towel.
7. Call for assistance if necessary e.g., to hand over the sterile supplies, to restrain the patient etc.
8. Place the patient in a comfortable position. See that the doctors or the nurse is also in a comfortable position to do the procedure.
9. Apply restraints in case of children.
See that the unit is in order with no unnecessary articles. Clear the bedside table or over-bed table and arrange the articles conveniently.
10. See that there is sufficient light. Adjust the spot light to provide maximum light in the wound area.
11.Turn the patient’s head away from the wound to prevent the patient from seeing the wound and getting worried.
PROCEDURE
Steps of Procedure
1. Wear mask and wash hands.
Purpose: to prevent cross infection.
2. Open the sterile tray and spread the sterile towel around the wound.
Purpose: to create a sterile field around the wound and to minimize the wound of contamination.
3. Control the haemorrhage either by exerting pressure on the wound or by applying haemostats on the bleeding vessels.
Purpose: checking haemorrhage is necessary to prevent shock and also to prevent complications later (e.g. haematoma)
4. Prepare to anaesthetise the wound edges. Take the local anaesthetic in a small syringe. Insert a small guage needle gently into the margin of the wound. Aspirate to prevent accidental injection of the anaesthetic agent into the blood vessels. Inject the anaesthetic slowly into the wound margins.
Purpose: accidental injection of anaesthetics into the blood vessel can cause arrhythmias in the patient.
5. Clean the wound thoroughly with normal saline using a 20 ml syringe. Irrigate the wound with large amounts of normal saline solution to remove all foreign bodies lodged in the wound. (cleaning may be done by using a bulb syringe or a septo syringe).
Purpose: thorough cleaning of the wound helps to keep the wound clean and thus aids in the healing process.
6. Cleaning of the wound also facilitates thorough inspection of the wound for damage to the bones and tendons.
Using a sharp scissors or a scalpel, trim the ragged edges of the wounds and cut off the dead tissues, if any.
Purpose: to provide straight edges so that the wound edges remain in apposition and healing will be promoted.
Dead tissues are devitalized tissues which will not help in the healing process.
7. Put on fresh sterile gloves and sterile drapes, if necessary.
Purpose: to minimize wound contamination.
8. The wound margins are carefully brought together and the wound is closed layer by layer.
Round body needles and catgut are used for suturing the subcutaneous tissue. Cutting needles and non absorbable materials are used for the skin.
Use interrupted sutures tied with a square knot. Sutures should be firm but not tied with excess tension.
Purpose: too tight knots will cause necrosis by cutting the blood supply. The knots will become tighter on the next day due to the formation of oedema and the patient will complain of much pain.
After Care of the Patient and the Articles
1. Following wound closure, clean the wound again and apply a multilayered dressing to absorb drainage and to arrest bleeding by exerting pressure.
2. Secure the dressings with a roller bandage or adhesive tapes. As far possible, avoid covering the wound area with adhesive straps, completely, because it may foster accumulation of moisture and subsequent maceration of the wound edges.
3. Keep the wound as dry as possible.
4. Remove the mackintosh and towel. Replace the bed linen. Change the garments if necessary. Make the patient comfortable by adjustable his position in bed.
5. Ask the patient to rest in bed to prevent fainting attacks.
6. Elevate the injured part above the heart level to minimize the oedema and pain. Mild analgesics may be given to reduce pain.
7. Take all the articles to the utility room. Discard the soiled dressing and send for incineration. Wash and clean the articles first in the cold water and then with warm water and soap. Wash them thoroughly and dry them. Reset the suturing tray and send for autoclaving. Replace all articles to their proper places.
8. Wash hands. Record on the nurses record with date and time the type of the wound, the number of sutures applied, type of drainage tube applied, if any etc.
9. Return to the bedside to assess the comfort of the patient and to observe the condition of wound. Watch for any bleeding from the wound area. Change the dressing if there is an excessive bleeding. Report to the doctor.
10. Watch for the vital signs regularly to detect early signs of shock and collapse on the first day and signs of infection on subsequent days.
11. Unless signs of infection occur, the dressing should be left undisturbed until time for suture removal. Changing the dressing frequently causes friction on the wound edges and increases the possibility of the wound infection.
12. Inject tetanus toxoid, if it is not given previously.
13. On discharge of the patient, the patient should be given the instructions about the care of the wound, and the time when he has return for the removal of sutures.
REMOVAL OF SUTURES
The sutures may be removed by the surgeons or by the nurses according to the hospital customs. In all cases the surgeon gives the written order for the removal of the sutures.
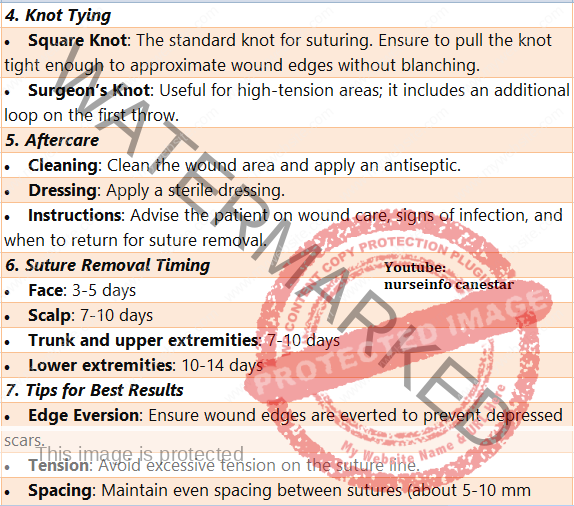
The skin sutures are left in place for a varied length of time. The usual timings are:
Scalp and face: 2 to 5 days
Abdominal wounds: 7 to 10 days
Lower limbs: 10 to 14 days
GENERAL INSTRUCTIONS
1. Confirm the doctor’s orders for the removal of the sutures.
2. The suture removal is done in conjunction with a dressing change.
3. Toothed dissecting forceps and a pair of scissors with a short, curved, cutting tip that readily slide under the suture are used.
The suture line is cleansed before and after suture removal.
4. While removing interrupted sutures, alternate ones are removed first. The remaining sutures are removed a day or two later. If wound dehiscence occurs, the remaining sutures may then be left in place.
5. Suture material that is beneath the skin is considered free from bacteria, and those visible outside is in contact with the resident bacteria of the skin. It is important that no part of the stitch which is above the skin level enter and contaminate the tissues under the skin.
6. Suture material left beneath the skin acts as a foreign body and elicits the inflammatory response. While removing sutures, care to be taken to remove them completely. Each suture should be examined for its completeness. Every interrupted suture will have one knot and four ends when removed completely. The number of sutures should be counted before and after removal.
7. If wound dehiscence occurs during the removal of the sutures, inform the surgeon immediately. In case of abdominal wounds, resuturing is imperative to prevent evisceration. In other places, if resuturing is not necessary, adhesive tapes should be applied to approximate the wound edges as closely as possible.
8. After the removal of sutures, even if the wound is dry, a small dressing is applied for a day or two to prevent infection. The patient should be told about the care of the wound. He is advised to take rest after removal of sutures of an abdominal wound. The patient should be told not to strain the part e.g., not to cough or lift heavy weight after removal of sutures from the abdomen. This will prevent wound dehiscence.
9. If wound discharge occurs, the patient should be instructed to contact the surgeon. Presence of pain and swelling at the wound line are the signs of complications.
10. Abdominal belts or many tailed bandages may be applied on the abdomen after removal of abdominal sutures in obese patients to prevent wound dehiscence and evisceration.
SUTURE REMOVAL
To remove the interrupted sutures, grasp the suture at the knot with a toothed forceps and pull it gently to expose the portion of the stitch under the skin. Cut the suture with a sharp scissors between the knot and the skin on one side either below the knot or opposite the knot. Then pull the thread out as one piece. The suture which is already above the skin should not be drawn under the skin. After removal of sutures, every suture should be examined for its completeness. The number of sutures should be counted before and after removal. (it is not uncommon to find some sutures laid bury under the skin).
Mattress interrupted sutures have two threads underlying the skin. The visible part of the suture opposite the knot should be cut and the suture is removed by pulling it in the direction of the knot.
If a continuous suture is applied, it is cut through, close at each skin orifice on one side and the cut sections are removed through the opposite side by gentle traction.